To get full use of all the features in Book a Room you need to give full access rights to the resource calendars on the server. This let Book a Room for example alter the booking length, or do a Quick Book directly on the device.
If you don’t want to alter the settings and feel that the features that require write access to the room, you may set the room to read-only. You do that in the room settings in connect.bookaroom.se
There are two ways to access and configure the settings in Exchange Server and Office365. Below are a guide for each:
The Exchange Control Panel may be the preferred method for setting permission since it is graphical and more intuitive. Although we have found that settings set this way may take a longer time to get active on the server. Sometimes it takes up to a day for a change to fall through.
With this in mind, let’s get started!
This instructions will show you how to setup Office365 to use a Room accounts and give a Master account the rights to read and write in the rooms calendar.
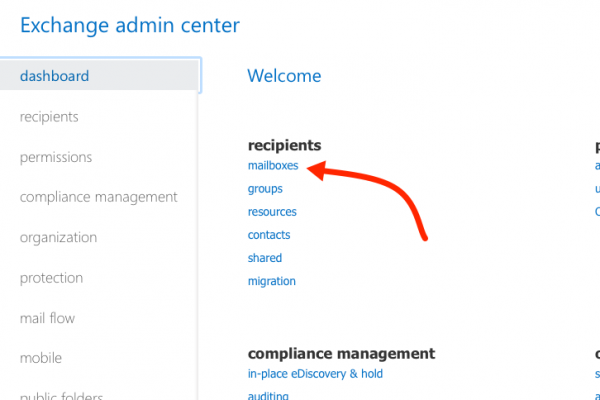
First off, log in to Exchange Control Panel in Office365 on https://outlook.office365.com/ecp and create your Master account if you haven’t already done so.
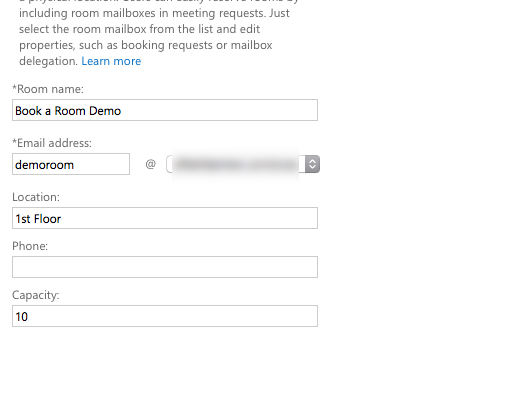
Then click on the Resources tab and create a Room mailbox. Name the room and give it an email address. This address is the one you set in the Connect Portal.
Location, Phone and Capacity has no function in Book a Room. But it may be useful for you when booking inside of Outlook.
When you saved and returned to the previous page your new room should appear in the bottom of the list.
Click the edit icon to manage the settings of the room.
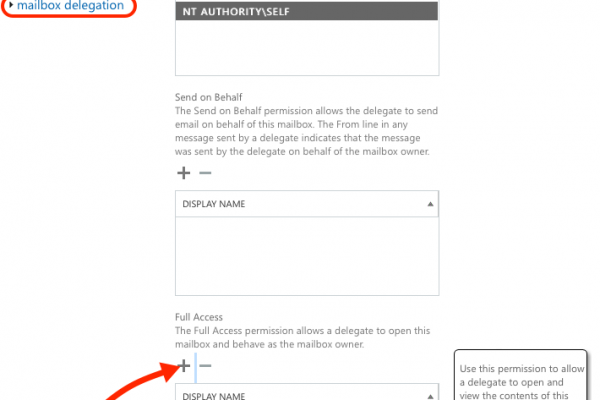
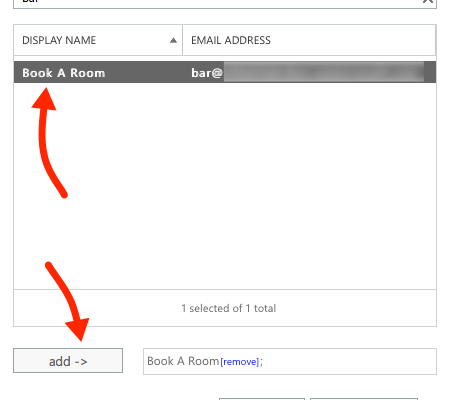
Select Mailbox Delegation and scroll down to the bottom to the Full Access box. Select the Master account you create in the previous step, click “add” and OK to exit the dialog.
Optionally you may want to add your own admin account to this list so that you can access the rooms calendars in case of support issues.
Next, log in to your Outlook using the Master account, or alternatively if you gave your ordinary account full rights you can use that one for the purpose of this tutorial. Right click on Other Calendars and search on the name you gave the room. It should appear and if everything’s right the calendar will mount in the calendar view.
If everything is as aspected you should be able to schedule directly in the room calendar. Drag out a new meeting in the calendar and when you start to write a little scroll bar will appear under the booking where you select the correct calendar. This way of booking may be used by i.e. a receptionist that handles all bookings of conference rooms. It gives a good overview of all resources and it gives you the possibility to set whatever subject you want on the bookings.
The Book a Room app always shows exactly what the subject is on the booking in the calendar.
As stated in the beginning most often the permissions take a while to actually apply. So beware of that and have some patience.
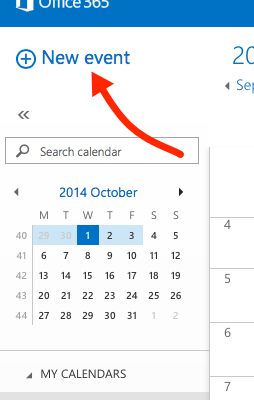
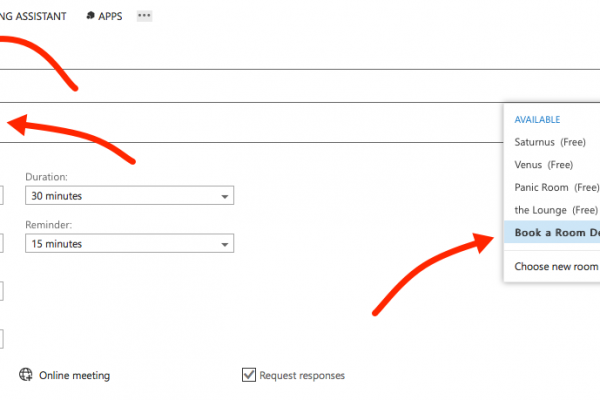
The more common way of booking a room is to invite the room from you ordinary calendar. Supposedly you know how to schedule a meeting in Outlook but for a quick recap, click on New event to get into the editor. Here you can add the room by clicking on Change room to add it as an attendee. If the room is available you will get an acceptance mail automatically from the server.
Done!
DISCLAIMER!
WE WILL NOT TAKE ANY RESPONSIBILITY FOR ANY MISCONFIGURATIONS THAT MAY DAMAGE YOUR SYSTEM!
You need a Windows machine with Microsoft PowerShell. This is built in with Windows Vista, Windows 7, Windows 8 and Windows 2003 and upwards. With Earlier versions of Windows, like XP, you need to download this tool from Microsoft here. Unfortunately there is no way that we know of that let you do this on a Mac or Linux operating system.
Download this script: Room-Mailbox
Unpack the file to your hard drive. Right click on the file and choose “Run with PowerShell“.
First you need to login to your Exchange Online or Office 365 account.
Select 0 to login. A dialog will appear where you should input credentials for an account with administrator permissions.
Once logged in you can select which operation you want to perform. You can ie create room mailboxes, convert between regular accounts and room mailboxes etc. This guide does not cover creating and manage accounts but the tool allows you to that if you want.
Select 10 to list your organisations rooms. Make a note of the rooms that you want to be accessed by Book a Room.
Select 7 to give your user Full Access and Send As permissions to your room.
Done!
If you like to explore some more of the configurations you can do with this script, feel free to do so on your own risk.
DISCLAIMER!
WE WILL NOT TAKE ANY RESPONSIBILITY FOR ANY MISCONFIGURATIONS THAT MAY DAMAGE YOUR SYSTEM!

